Index
Kwickscreen: Users Guide

Download User’s Guide PDF

This sign denotes
important information
Introduction
Thank you for purchasing a KwickScreen. KwickScreen is an award winning portable, retractable room divider with a very small footprint for easy storage and use. KwickScreens are simple to transport and clean. KwickScreens are often used in infection control, privacy and dignity, and new builds and refurbishments providing flexible space management within healthcare. Wemtech health and safety reports can be provided upon request.
PLEASE READ BEFORE USE
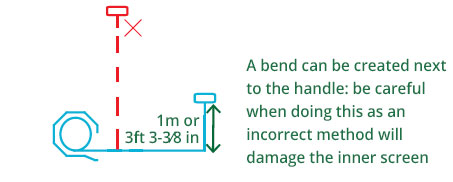
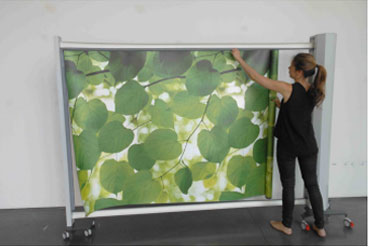
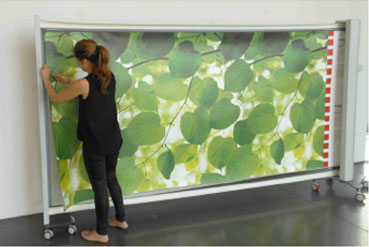
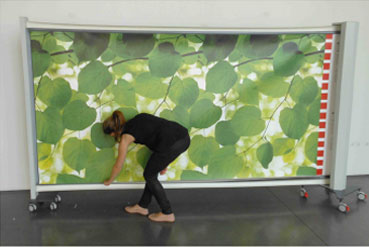
It is important to be gentle when pulling the KwickScreen out for use. This is especially true when the product is new or if it has not been used recently.
The screen must be allowed to find its ‘natural position’ where the screen moves smoothly in and out of the casing. If you find the screen more difficult to push in or pull out, or you hear a crumpling sound, then reverse your action (push if pulling and pull if pushing). This is a rare occurrence but if forced, the screens will crumple and this will cause damage and can crease the inner panel.
If you have purchased a printed screen we recommend leaving it open in a well ventilated space to remove the smell of ink for 3-4 days.
Read all instructions in this user guide prior to installation and operation of your KwickScreen.
For personal and operational safety, use only parts approved by KwickScreen.
Before installation ensure all parts are present, complete and without defects.
If you believe parts to be missing contact info@sohokwick.com
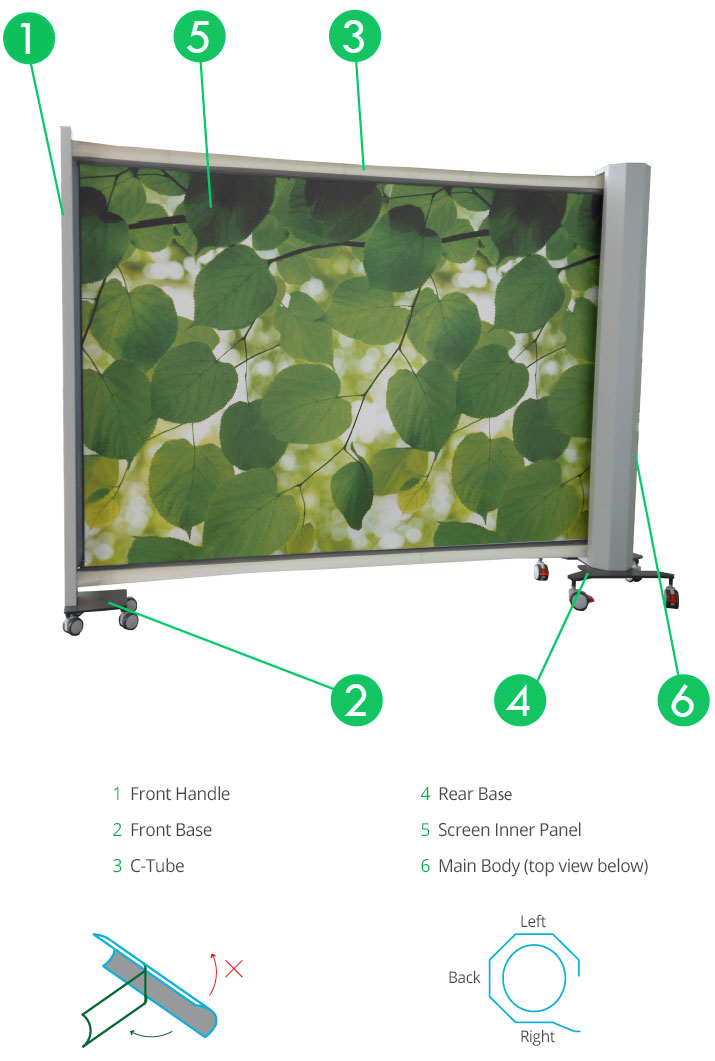
Operation
General Instructions
The KwickScreen is designed for use on smooth, horizontal surfaces. Extra care should be taken when using on other surfaces
When moving the KwickScreen check all 4 brakes have been released. The unit should then be moved with two hands at low down waist height
Push/pull gently
If there is resistance then stop, pull out and push in again gently
Make sure the front handle is vertical and that its four wheels are all in contact with the floor

IF LEAVING THE SCREEN ON AN INCLINE, ENSURE ALL
BRAKES ARE ENGAGED
DO NOT RUN WHEN USING THE KWICKSCREEN
IF YOU EXPERIENCE ANY PROBLEMS,
PLEASE CALL OUR TECHNICAL HELP LINE 888-881-8830
How to Use the Kwickscreen

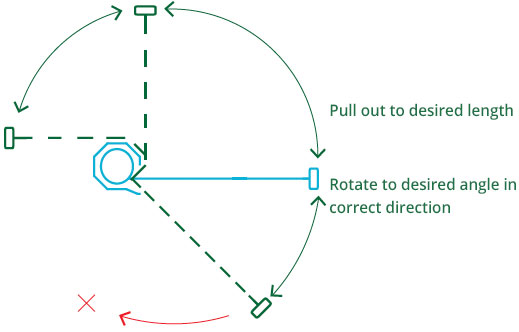
Configuration
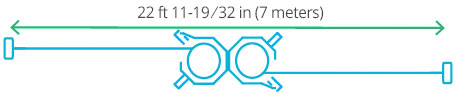
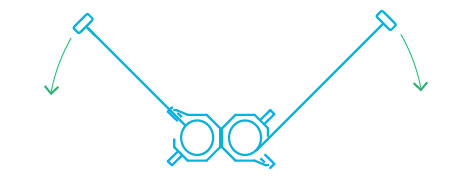
FREE STANDING


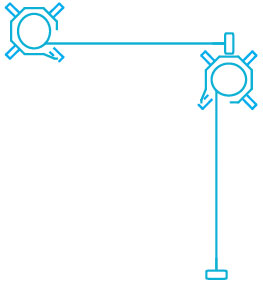
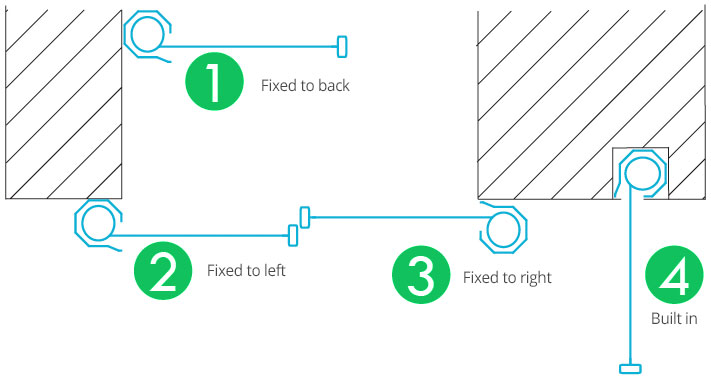
FIXED TO WALL
The KwickScreen can be used in a more permanent way by being fixed to the wall with a top and bottom bracket. Here are a few examples of possible configurations:
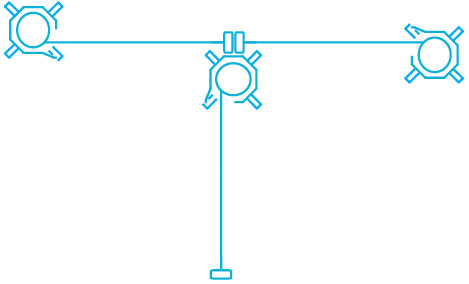
TWIN
The KwickScreen can also be delivered as two units attached together back to back on a single wheel plate.
A FIXED TO THE FLOOR DESIGN IS ALSO AVAILABLE:
CALL OUR TECHNICAL HELP LINE FOR MORE INFORMATION
888-881-8830
Cleaning
KwickScreens are designed in line with infection control performance specifications. The smooth surfaces are easy to clean and designed to withstand regular cleaning. The metal parts are powder-coated and the screen material is polyester film manufactured by DuPont.
NORMAL CLEANING
Surfaces should be cleaned using a solution of warm water and mild detergent. Use a clean soft cloth and rinse with clean water after washing.
Hypochlorite may also be used on the screen material. Hypochlorite can be applied at 1000–10000 ppm or a 70% alcohol solution.
STUBBORN STAINS
If normal cleaning does not remove all stains the following cleaning agents may be used at room temperature
- Methyl alcohol butyl alcohol
- Naptha VM&P
- Ethyl alcohol
- Isopropyl alcohol.
DEEP CLEANING
Deep cleaning is recomended every 3-4 months. To deep clean, retract screen fully and clean inside the body.
WHEN CLEANING THE
KWICKSCREEN
DO NOT USE:
- Wax polishes or solvents
- Products with an abrasive surface such as steel wool
- Detergents which can form lime or synthetic detergents
- Alkalis
- Solvents
- Gasoline
- Greases or oils
- Cloths containing grit or abrasive particles, or kitchen scouring compounds to clean the printed polyester film surface
- Razor blades or other sharp in-struments to scrape the surface
- Gasoline to remove stains
Do not clean in direct sunlight or in elevated temperatures
Replacing or Changing the Inner Panel
To insert, follow steps 1-6
To remove, follow 2-3, then 6-1
1Extend screen fully
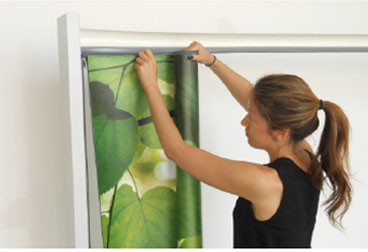
2Inserting screen, start in top left corner and start zip
3With one hand supporting rolled screen slowly zip top zip. Once done, zip the bottom and side zips

4Pass extra screen around roller and align magnetic strips
5Close the side zip
6Close the bottom zip. Reverse process to remove screen
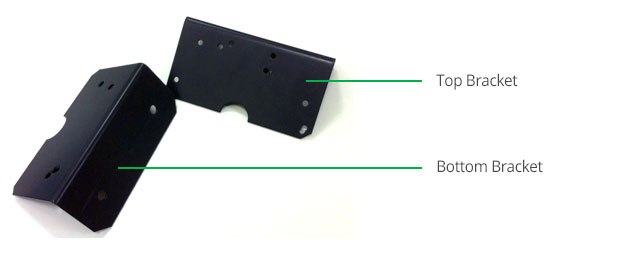
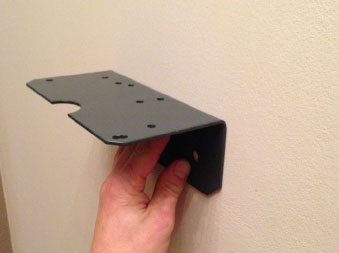
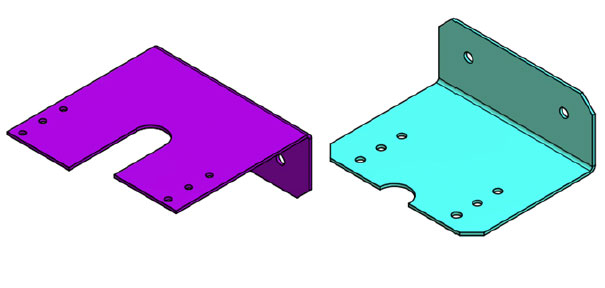
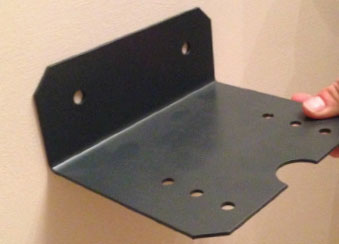
Universal Bracket Pair
The universal bracket pair is a top and bottom bracket set which allows the attachment of a KwikScreen to a wall. The right, left and back sides of the main body can be fixed to a wall using the different holes provided on the brackets.
Top Views – Showing the top universal bracket in 3 orientations:

Bottom Views – Showing the bottom universal bracket in 3 orientations:

The universal brackets are desgined to fit on any side of the product. As such the brackets have multiple holes on them, this is not a manufacturing default and the appropriate holes to use will become apparent during installation.
Installing the Universal Bracket Pair

To fix the KwickScreen to the wall, the top of the main body needs to sit flush with the top of the front handle. Therefore the bottom of the main body needs to be mounted 135mm from the floor, meaning the holes for top bracket will be centered at 159mm from the floor and the top bracket holes will be 1851mm from the floor.
One simple method to achieve the appropriate height is to measure the top bracket’s location first, using the top of the front handle as a guide.
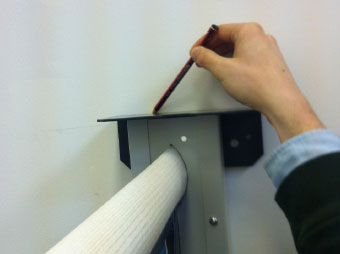
Use the front handle with the bracket resting on top to mark a line on the wall.
Align the top edge of the top bracket to the line and fix to the wall.
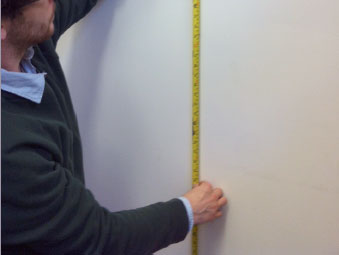
Measure down 69-17⁄32 in. from the top bracket line and make a new horizontal line.
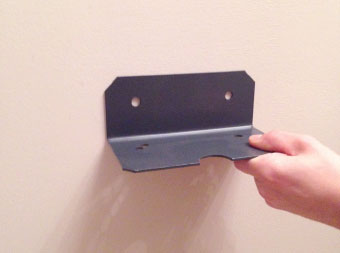
Align the bottom edge of the bottom bracket to this line, making sure the two brackets are vertically aligned, and fix to the wall.
Attaching the Bracket to the Main Body
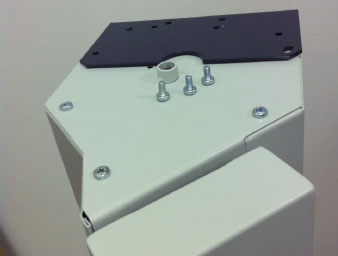
For the top bracket, remove the 3 appropriate screws from the top of the main body.
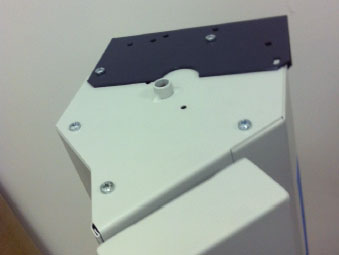
Re-insert the removed screws through the bracket and the main body via the appropriate holes.
For the bottom bracket, align 2 of the 4 protruding studs on the bottom of the main body with the 2 of the holes on the bottom bracket. Fit the studs into the holes and fix using 2 of the ‘nylock’ bolts provided.
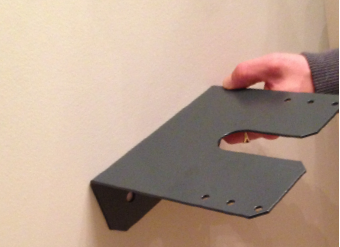
Extended Bracket Pair
A top bracket and a bottom bracket set that can only be positioned at the back of the product but that has 3 hole positions to give clearance between the back of the product and the wall, to allow for trunking or other wall-based obstacles.
Installing the Extended Bracket Pair
The extended bracket pair are designed to replace the universal bracket pair. Therefore instructions from ‘installing the universal bracket pair’ can be followed. The extended bracket cannot however be used for attachment to the left or right sides of the main body, but has holes which will allow for 3 different distances between the wall and the back side of the main body.
Top extended bracket, use alignment procedure discussed on the previous page
Bottom extended bracket, align below top bracket at the base of the main body
Additional Notes / Alternate Method

Although we recommend following the instructions in the previous section, brackets can be installed facing away from the main body. If this method is used, make sure that the top of the KwickScreen’s main body is level with the top of the front handle.
Warranty
- Should you experience any problems with our workmanship or materials within the first 2 years please contact your point of purchase.
- Repairs made during the warranty period will be carried out free of charge, provided the product has been used strictly in accordance with the guidelines set out in this guide.
- The warranty does not cover replacements, adjustments or repairs which may be required as a result of normal wear and tear, willful or accidental damage, misuse, neglect or any cause which is beyond the control of SohoWerks/Kwickscreen.
- Modifications and repairs made to this product by unauthorised persons will render the warranty void.
- Only parts manufactured or approved by KwickScreen shall be used to repair this product. Use of unauthorized parts will invalidate all warranties and remove all liability from SohoWerks/Kwickscreen for the safety of the product.
![]()
For any questions, issues or technical support,
call 888-881-8830 or visit www.sohowerks.com/kwickscreen